Hello
Everybody!
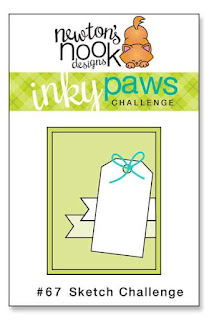
Welcome to a NEW Inky Paws Challenge.
This
time around we have a color challenge for you.
I
don't know about you guys but this time changes got me all messed up.
The
upside to this is that spring has sprung.
All the flowers in my yard are starting to
bloom and there is color everywhere!
With
Easter around the corner I thought I would take the opportunity
to dig deep
into my bag of crafty trick and do something a little different.
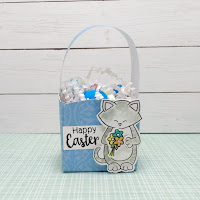
Using
the challenge colors, I came up with these cute mini Easter baskets.
The idea for these baskets came sometime ago when I when
I taught a class on
how to use your Score-pal. You guys remember that tool,
most people still have one.
This
is surprisingly simple, and here it is.
Start
with a 6-inch round circle.
How
you create that circle is up to you if you want to use your Silhouette, cricket,
or just your dig into the stash and grab that Circle cutter.
The important
thing to remember is it must be 6-inch round, or your final basket will be
lopsided.
Once
your circle is cut, take out your favorite scoreboard of your choice and you’re
going to score at the 2-inch line and the 4-inch line. Turn to the right and
score at the 2-inch line and the 4-inch line again.
Next,
score all those round corners from the center Square out.
Finally,
fold all those corners and then an attached those on the inside with your
favorite heavy glue.
The
handle of the basket is simply a 1-inch strip of paper that is glued to the inside.
To
decorate my baskets, I grabbed my Sending
Hugs Stamp Set,
and
use elements from the stamp set to make each basket individual and unique.
I had
a great time picking and choosing which one of my
favorite Newton aniamal was going to go with what
basket color.
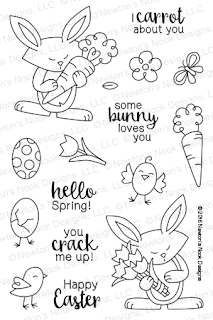
The “Happy
Easter” sentiment is from the Hello
Spring Stamp Set
I
know what you're thinking, there’s a die somewhere from a company that does
this? This is true.
Sometimes,
I like to just create things from scratch. I LOVE all the crafty tools that I
have in my arsenal, and I LOVE to pull them out and used them whenever I can.
This
is such an easy project that even little hands can help you with it.
Also, is a great classroom project for you teachers out there.
That
is my inspiration for today. I hope that this inspires you to grab your
favorite
Newton
Nook Stamp Set, your favorite tool from your stash and create something.
Don’t
forget to show us what you create using the link above in the challenge
picture.
As always,
links to the stamp sets and dies are below.
Thank
you so much for stopping by.
See
you at the halfway point.
Diane